
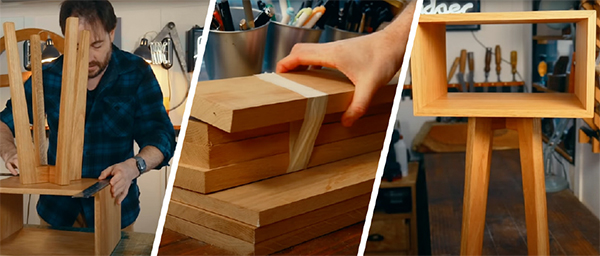
Build a Stylish Side Table Yourself
A simple side table can be more than just a practical piece of furniture. With clean lines, precise joints and carefully crafted details, it can become a real feature in any room.
In this project, Badger Workshop shows how to build a modern side table step by step. From preparing the individual components to assembling the case and constructing the tapered legs, precision and careful preparation are key throughout the build.
Want to build the project yourself? The complete build plan includes all the dimensions, cutting details and steps you need to get started.
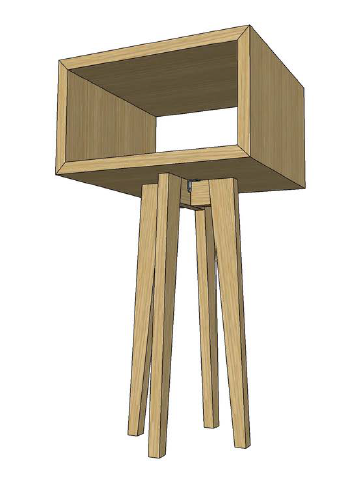
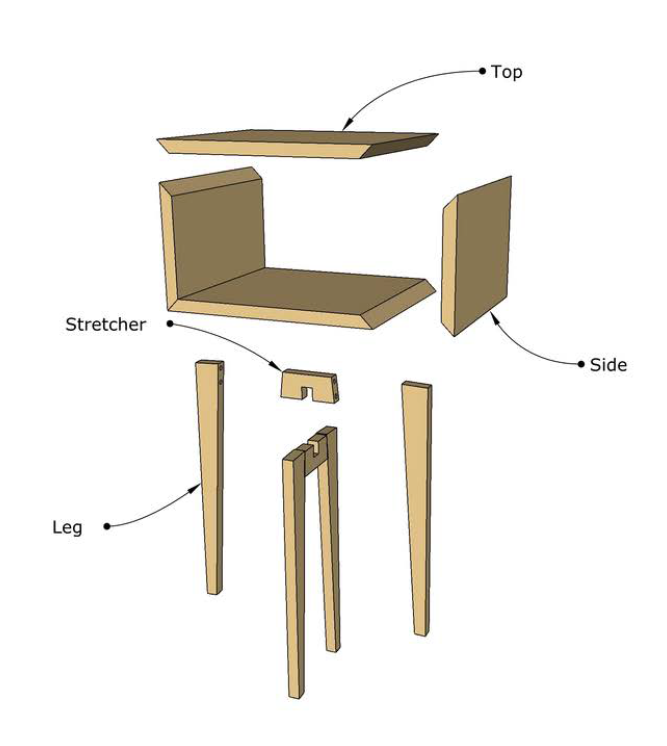
Cut list & Materials
| Part | Description | Quantity | Length | Width | Thickness |
| A | Top & Bottom | 2 | 350 mm | 300 mm | 20 mm |
| B | Side | 2 | 300 mm | 200 mm | 20 mm |
| C | Leg | 4 | 458 mm | 45 mm | 20 mm |
| D | Stretcher | 2 | 100 mm | 45 mm | 20 mm |
Supplies
Additional
| Description | Size | Quantity |
| 20 x 300 mm Pre-Glued Board | 2.050 mm | 1 |
| 20 x 45 mm Lumber | 1.200 mm | 1 |
| 8 mm Dowel | 38 mm | 8 |
| L Bracket | 20 mm | 2 |
- Wood glue
- Sandpaper
- Bee wax
- Clamps
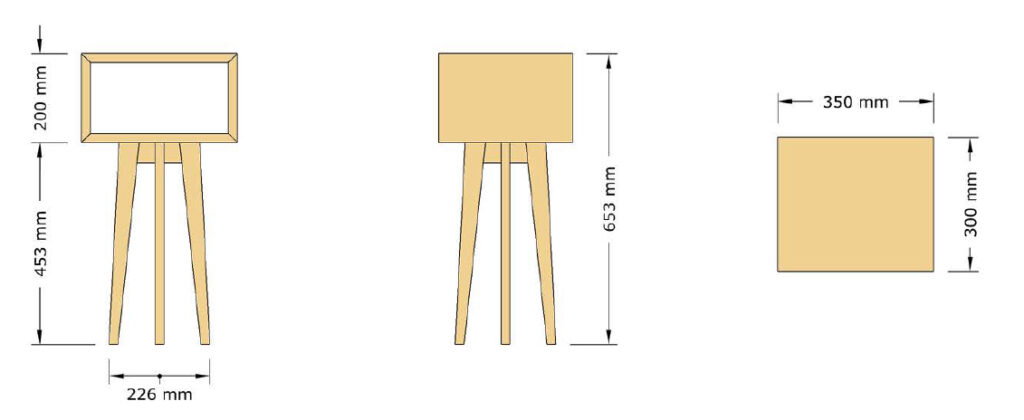
Overall Dimensions
How to build it Step by Step
Step 1: Top & Bottom
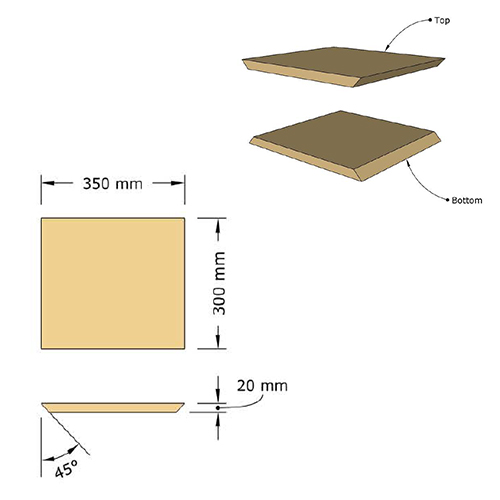
Set the table saw blade to 45° to make the first bevel cut. Measure and set the fence distance from the blade according to the size (see diagram above). Make the second cut and repeat until you get top and bottom. Important: Ensure the fence is parallel to the blade to avoid kickback.
Step 2: Sides
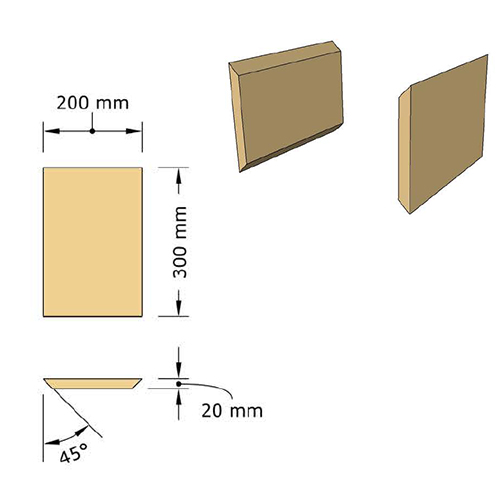
Using the same table saw blade set, measure and set the fence distance from the blade according to the side size (see diagram above). Repeat until you get both sides.
Step 3: Case Assembly
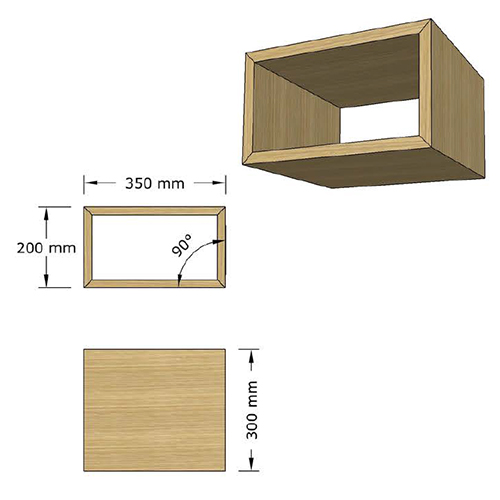
Glue up all the case parts using PVA glue and corner clamps. Important: Make sure everything is square.
Step 4: Legs (Miter Cut)
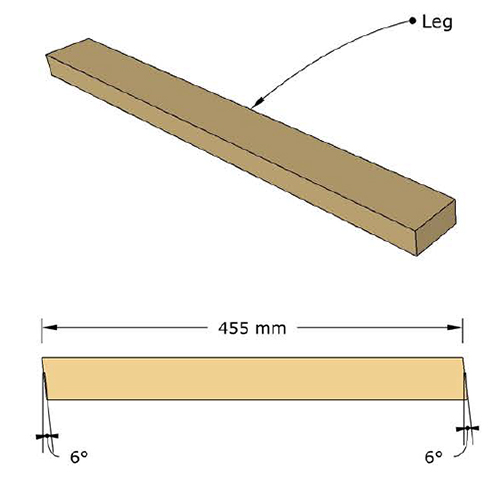
Set the table saw blade back to 90°, then set the miter gauge to 6°.Cut one end of the leg, measure and set the distance from the blade according to the size (see diagram above). Make the second cut and repeat to get four legs. Tip: Place the wood securely against the miter gauge. Align the cut line with the blade, ensuring everything is firmly in place.
Step 5: Stretchers (Miter Cut)
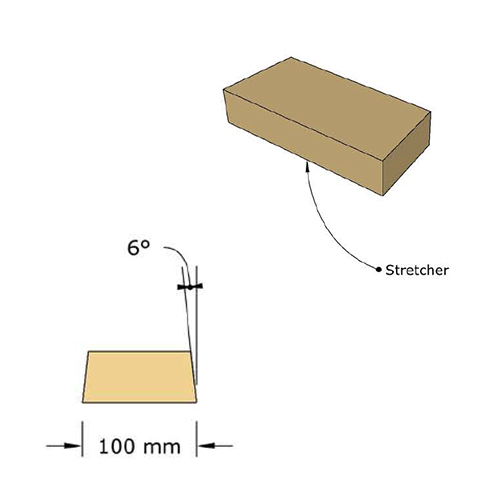
Using the same set, measure and set the distance from the blade according to the side size (see diagramm above). Make two more cuts to get the two stretchers.
Step 6: Legs Assembly (Preparation)
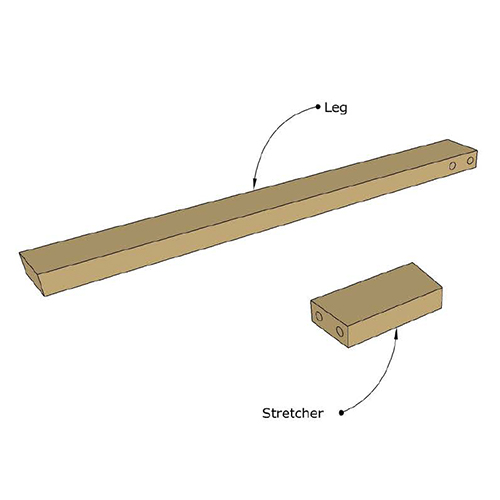
Prepare legs and stretchers for assembly. To joint all pieces together drill holes for dowels with a dowel jig. If you don’t have one just screw it and plug the holes.
Step 7: Stretchers (Notches)
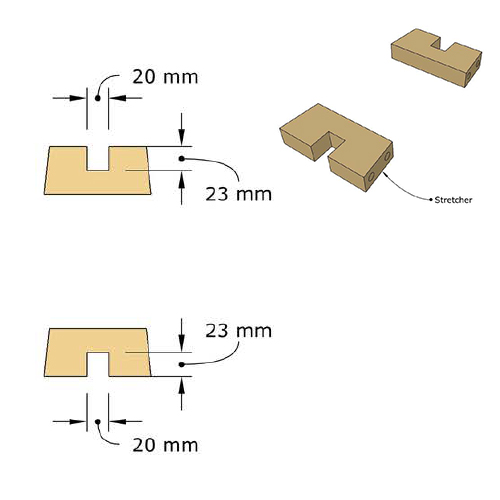
Stretchers are cross over each one. You need to cut a notch out of each one. Mark them using the diagram above. Set the blade height to the mark. Set the miter gauge back to 90° and make the cuts.
Step 8: Legs (Taper cut)
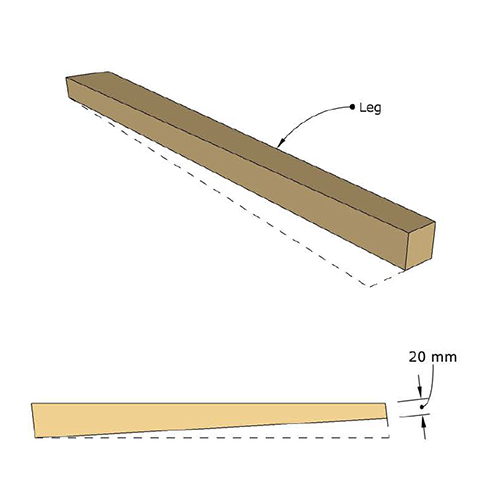
Mark the taper line using the diagram. Use a jig to make the cut.
Step 9: Legs Assembly
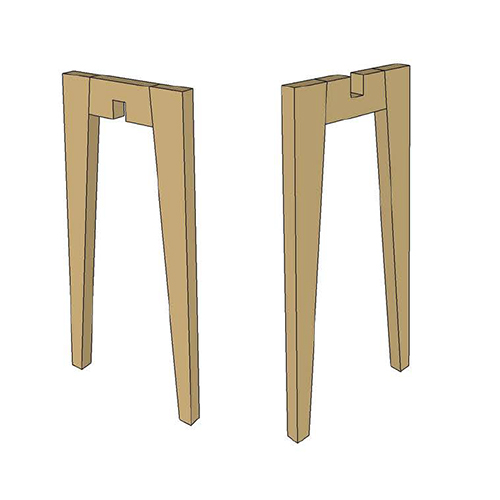
Now you can connect the legs and stretchers, put some glue into the holes, tap in the dowels, push everything together and clamp up.
Step 10: Final Assembly
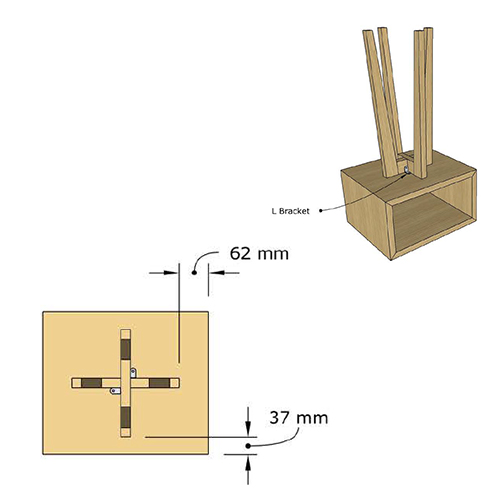
Sand and apply finish to all the components before attaching the two assemblies. Line up the assemblies as shown in the diagram using L brackets.
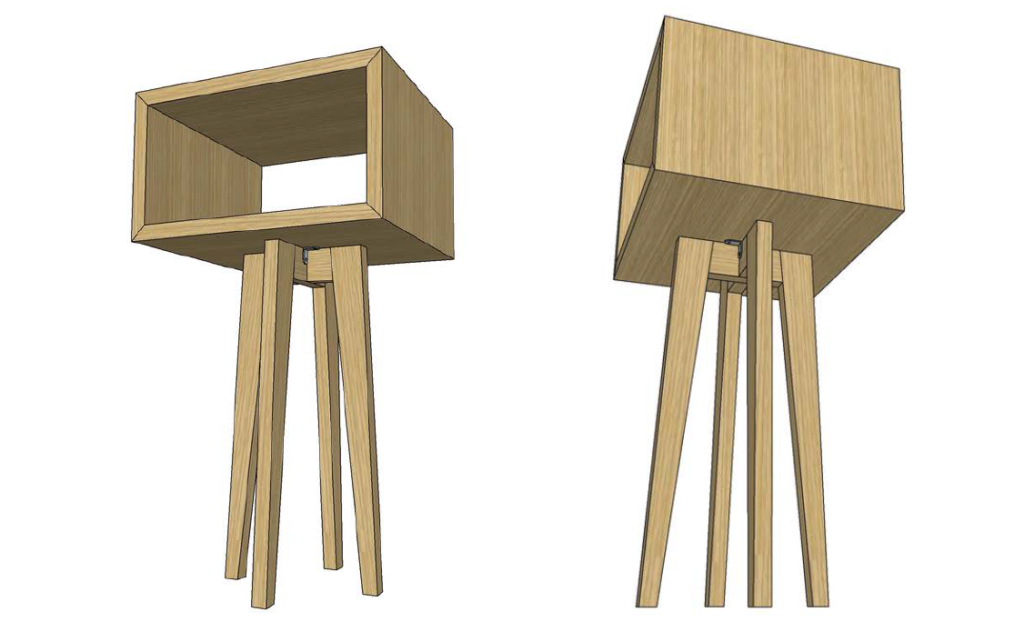
Watch the full Video on how to build it
Documents as PDF